This tutorial shows how to use Groovy language in Eclipse IDE.
Install Groovy Plugin
The latest update site link for 'Groovy plugin for Eclipse' can be found here.
In my case it is http://dist.springsource.org/snapshot/GRECLIPSE/e4.10.
I am using Eclipse Version: 2018-09 (4.9.0) and JAVA_HOME is JDK 11.
Install this plugin in eclipse by selecting menu Help>Install New Software...
Enter the update site link and choose the 'Main Package"
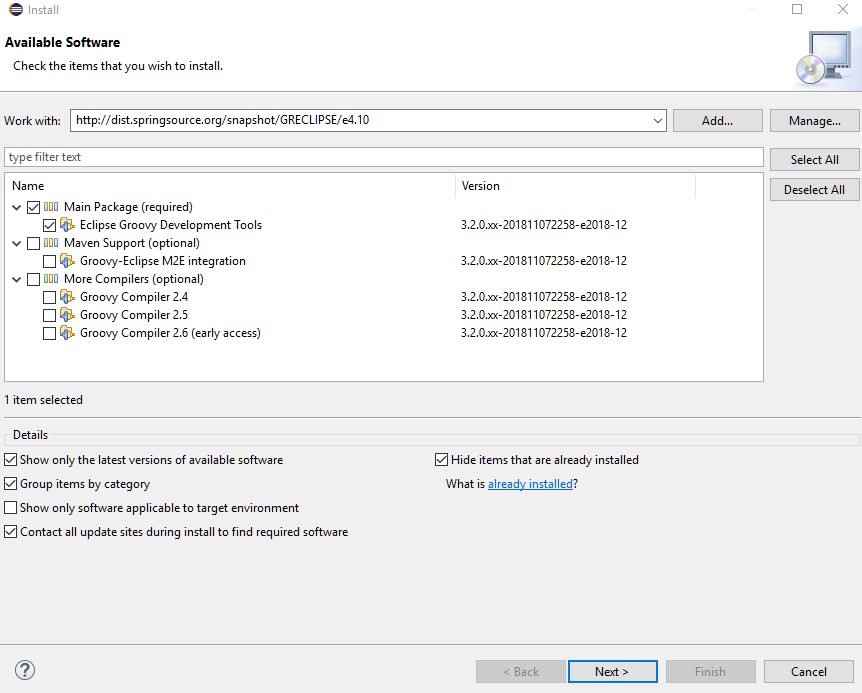
You can choose other stuff if you want to. The Main Package comes with the latest Groovy compiler, so probably you won't need some other compiler from the last option.
Creating Groovy Project in Eclipse
After installing and restarting, Groovy option will be available in 'Select a wizard' (File>New>Other)
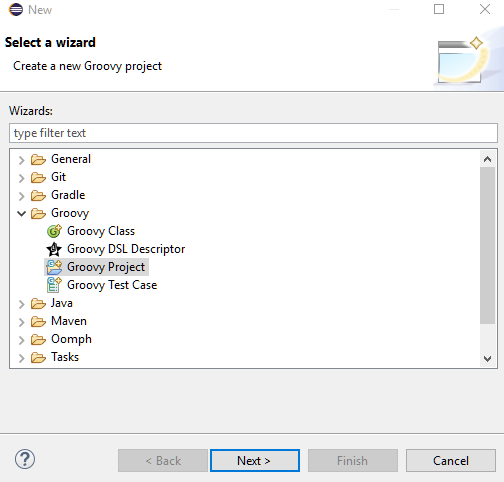
Select 'Groovy Project' and in the next step, enter 'Project name' (I entered 'hello-groovy').
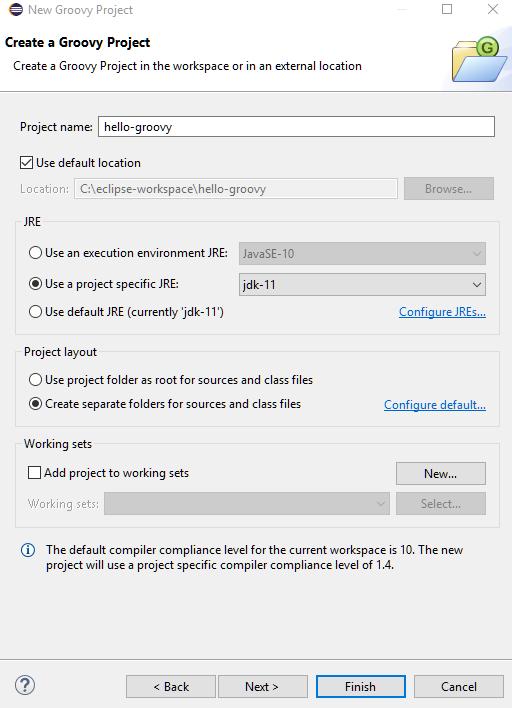
On Clicking finish you might get "Create module-info.java" dialog. Just click 'Don't Create' as we are not going to create a Java 9 based modular application.
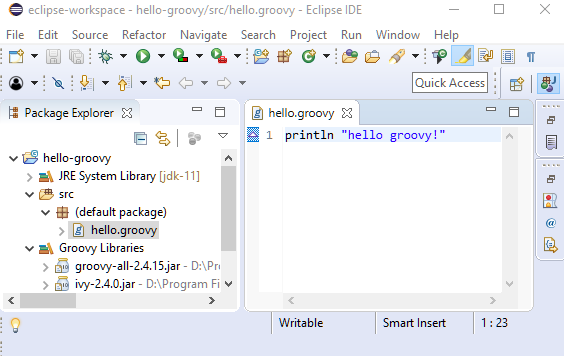
The groovy project will be created:

Note that the "groovy-all-2.4.15.jar" is also available (came with the groovy plugin).
Creating Groovy Script and Running
Right click on the project 'src' folder and choose 'File' and enter 'File name' as hello.groovy
Write some Groovy code in the editor:
Now the script can be run by Run As > Groovy script (either via right click menu or tool bar).
We can also use shortcut Alt+Shift+X release and then key press G.
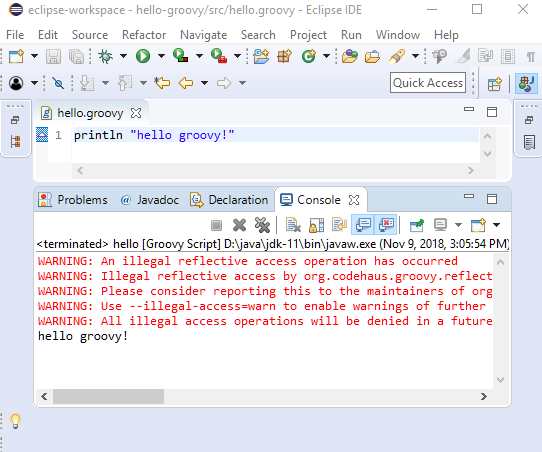
The warning is due to the Java 9 module changes as we mentioned in the last tutorial. Add following JVM option in Run Configuration> Arguments (tab):
--add-opens=java.base/java.lang=ALL-UNNAMED --add-opens=java.base/java.lang.invoke=ALL-UNNAMED
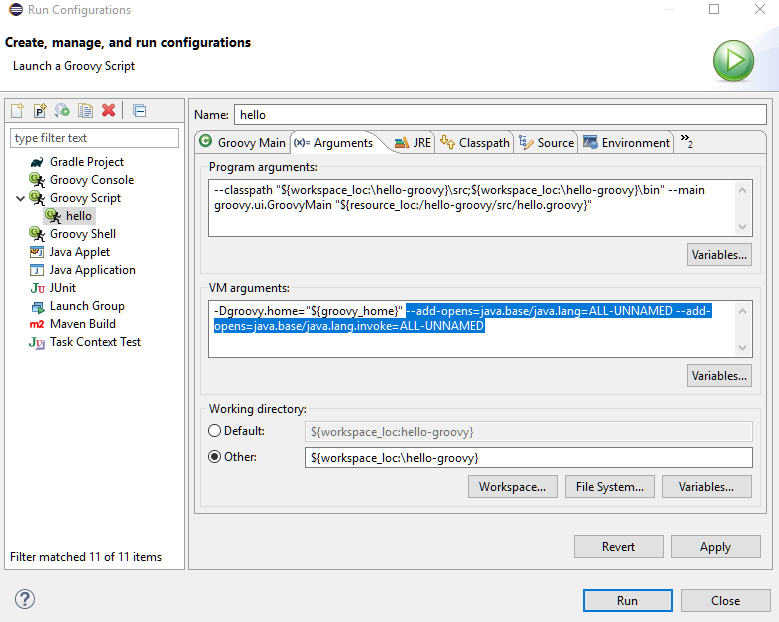
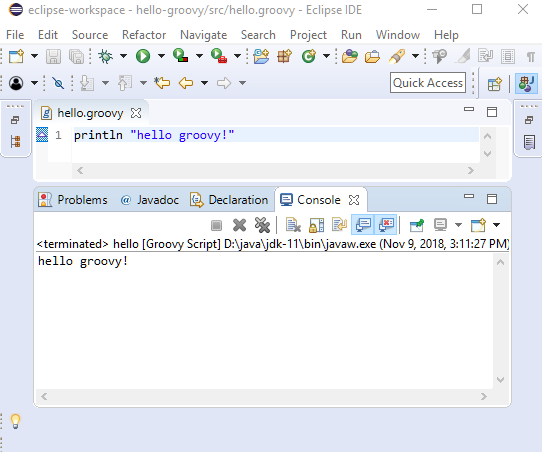
Click on 'Run', this time there won't be any warnings:
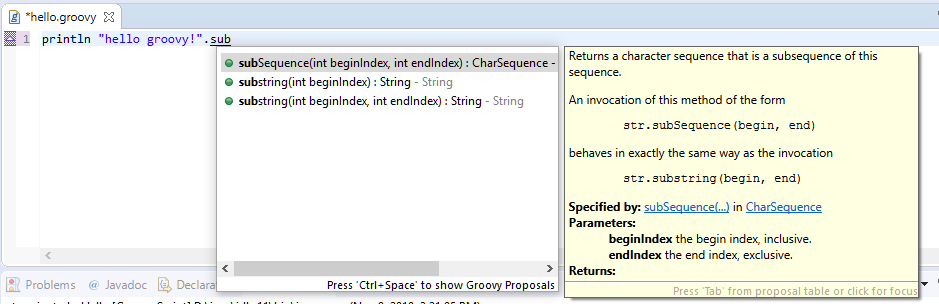
Code Autocompletion
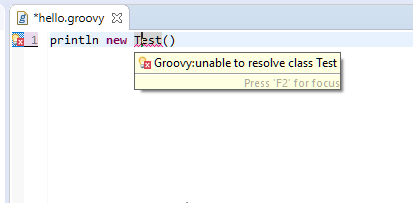
Eclipse also provides code autocompletion, help documents and error indications etc for Groovy:
|
