MS Windows
This guide will show how to access individual files from a windows 10 backup image instead of restoring the complete operating system.
Previously I created a system image using following dialog of windows 10 (Control Panel > System and Security > Backup and Restore > Create a system image >):
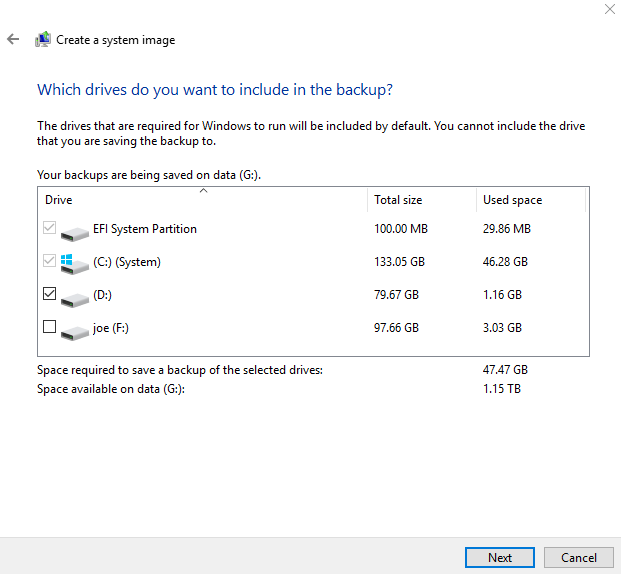
The image was saved to an external drive G:\
After creating the image I got G:\WindowsImageBackup folder. Under this folder I have some vhdx files which are kind of compressed drive which can be mounted:
G:\WindowsImageBackup\jpc\Backup 2019-02-12 052611>dir
 Volume in drive G is data
 Volume Serial Number is 86F1-32DE

 Directory of G:\WindowsImageBackup\jpc\Backup 2019-02-12 052611

02/15/2019  11:02 PM    <DIR>          .
02/15/2019  11:02 PM    <DIR>          ..
02/11/2019  11:58 PM               776 18dbda9a-888b-4f5b-bf89-57c0b20ff7ba_AdditionalFilesc3b9f3c7-5e52-4d5e-8b20-19adc95a34c7.xml
02/11/2019  11:58 PM            20,602 18dbda9a-888b-4f5b-bf89-57c0b20ff7ba_Components.xml
02/11/2019  11:58 PM             6,884 18dbda9a-888b-4f5b-bf89-57c0b20ff7ba_RegistryExcludes.xml
02/11/2019  11:58 PM            13,558 18dbda9a-888b-4f5b-bf89-57c0b20ff7ba_Writer4dc3bdd4-ab48-4d07-adb0-3bee2926fd7f.xml
02/11/2019  11:58 PM             1,488 18dbda9a-888b-4f5b-bf89-57c0b20ff7ba_Writer542da469-d3e1-473c-9f4f-7847f01fc64f.xml
02/11/2019  11:58 PM             1,484 18dbda9a-888b-4f5b-bf89-57c0b20ff7ba_Writera6ad56c2-b509-4e6c-bb19-49d8f43532f0.xml
02/11/2019  11:58 PM             2,940 18dbda9a-888b-4f5b-bf89-57c0b20ff7ba_Writerafbab4a2-367d-4d15-a586-71dbb18f8485.xml
02/11/2019  11:58 PM             8,706 18dbda9a-888b-4f5b-bf89-57c0b20ff7ba_Writerbe000cbe-11fe-4426-9c58-531aa6355fc4.xml
02/11/2019  11:58 PM             5,902 18dbda9a-888b-4f5b-bf89-57c0b20ff7ba_Writercd3f2362-8bef-46c7-9181-d62844cdc0b2.xml
02/11/2019  11:58 PM         6,034,244 18dbda9a-888b-4f5b-bf89-57c0b20ff7ba_Writere8132975-6f93-4464-a53e-1050253ae220.xml
02/15/2019  11:07 PM   128,477,822,976 846608e3-af51-4593-8ffd-438d47ca79e7.vhdx
02/15/2019  11:07 PM       566,231,040 996acd3f-50ce-468a-9d7e-6db0a9a1e1eb.vhdx
02/15/2019  11:07 PM    66,049,802,240 9e163fdf-f815-4408-a966-d8098e44ed4b.vhdx
02/11/2019  11:58 PM             1,962 BackupSpecs.xml
02/11/2019  11:58 PM       322,961,408 Esp.vhdx
              15 File(s) 195,422,916,210 bytes
               2 Dir(s)  1,268,779,982,848 bytes free
Looking at the sizes I figured 846608e3-af51-4593-8ffd-438d47ca79e7.vhdx used to be the C drive from where I want to access some files now.
Mounting vhdx image
Hit shortcut key Window + S and type 'Disk Management' (create and format hard disk partitions).
Click on 'create and format hard disk partitions':
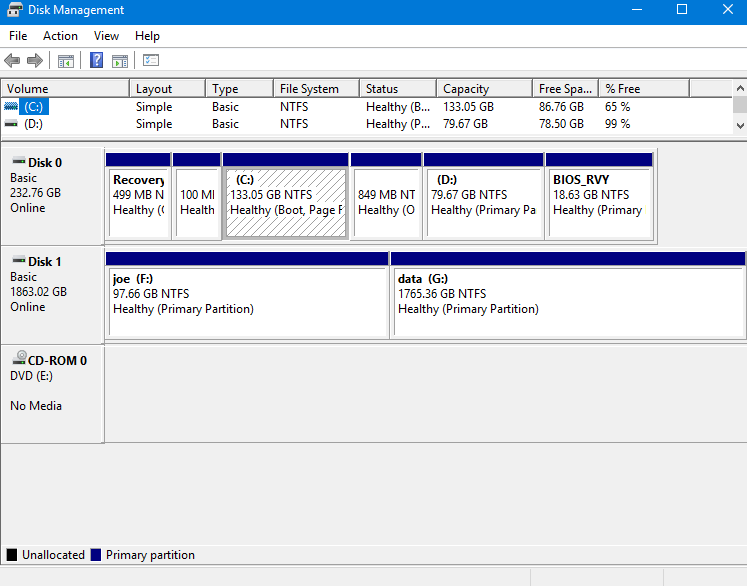
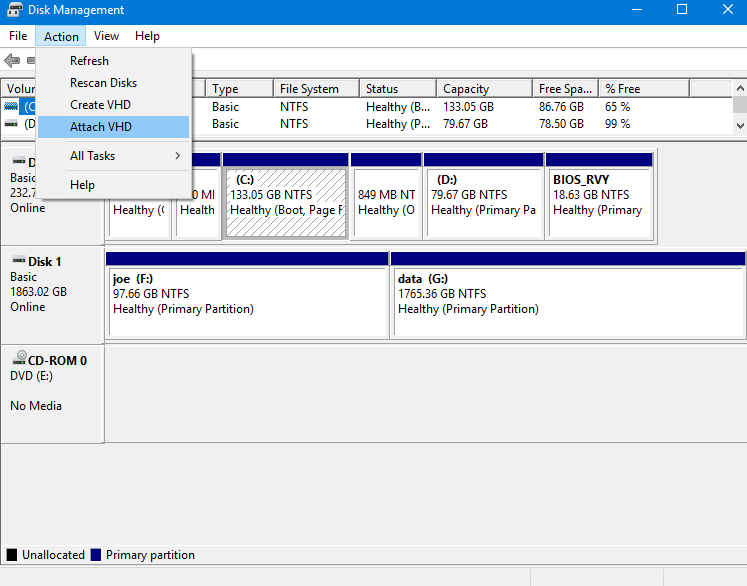
Now click on Action > Attach VHD as shown:
It will open following dialog:
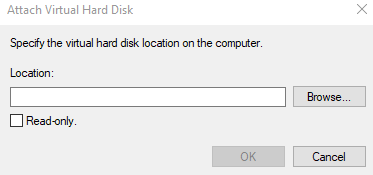
Click on Browse. I'm going to select the vhdx which I mentioned above:
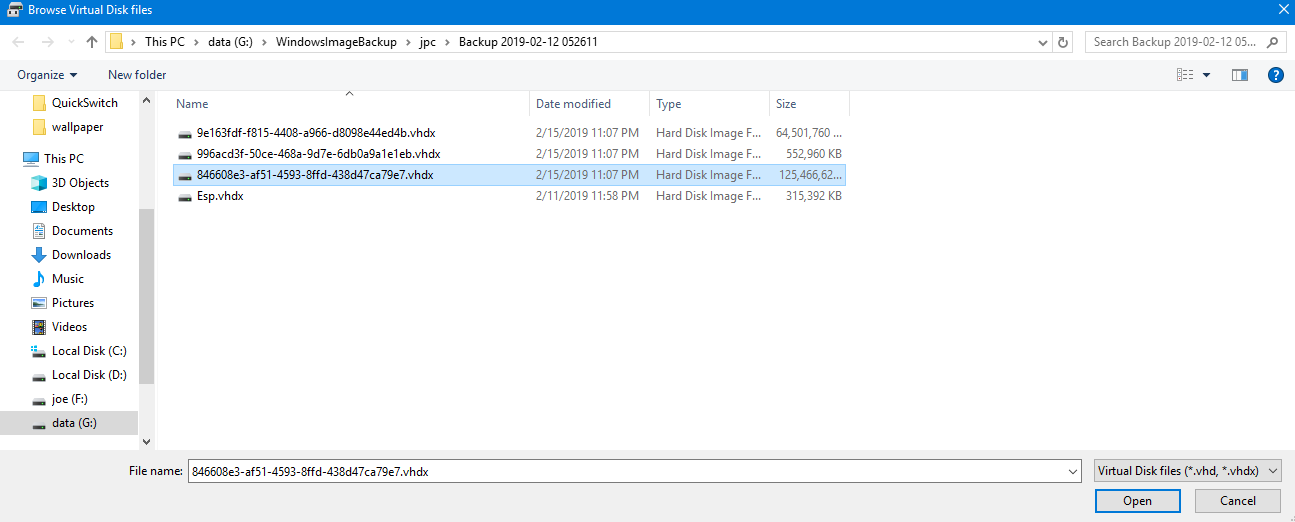
It will mount Disk 2 as shown below:
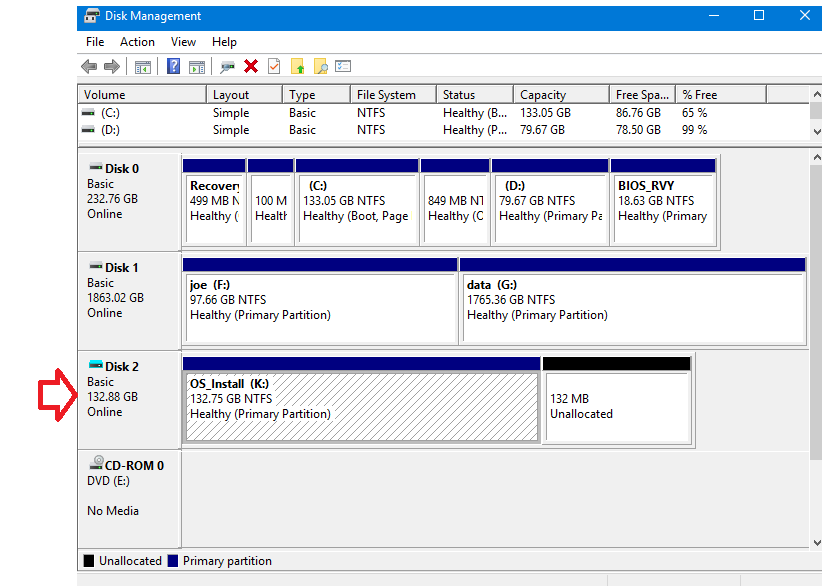
Opening the drive
Right click and clicking on 'Open' option will get you the backup folder in file explorer.
What if 'Open' option is disabled?
In some cases 'Open' option might be disabled. Also no drive letter (like K in above example) will be assigned. In that case you can fix that with following steps.
Assigning drive letter via diskpart
Open command prompt (run as admin).
Type diskpart
C:\Windows\system32>diskpart

Microsoft DiskPart version 10.0.17763.1

Copyright (C) Microsoft Corporation.
On computer: DESKTOP-IO22GN4
Select disk 1:
DISKPART> select disk 1

Disk 1 is now the selected disk.
list volume:
DISKPART> list volume

  Volume ###  Ltr  Label        Fs     Type        Size     Status     Info
  ----------  ---  -----------  -----  ----------  -------  ---------  --------
  Volume 0     E                       DVD-ROM         0 B  No Media
  Volume 1         Recovery     NTFS   Partition    499 MB  Healthy
  Volume 2     C                NTFS   Partition    133 GB  Healthy    Boot
  Volume 3                      NTFS   Partition    849 MB  Healthy
  Volume 4     D                NTFS   Partition     79 GB  Healthy
  Volume 5         BIOS_RVY     NTFS   Partition     18 GB  Healthy
  Volume 6                      FAT32  Partition    100 MB  Healthy    System
  Volume 7     F   joe          NTFS   Partition     97 GB  Healthy
  Volume 8     G   data         NTFS   Partition   1765 GB  Healthy
  Volume 9     K   OS_Install   NTFS   Partition    132 GB  Healthy
In my case 'Volume 9 K OS_Install NTFS Partition 132 GB Healthy' is what I'm interested in. The drive letter is already assigned as K. In your case if no letter
is assigned then you can fix that will following two steps:
DISKPART> select volume 9

Volume 9 is the selected volume.

DISKPART> assign letter=M

DiskPart successfully assigned the drive letter or mount point.
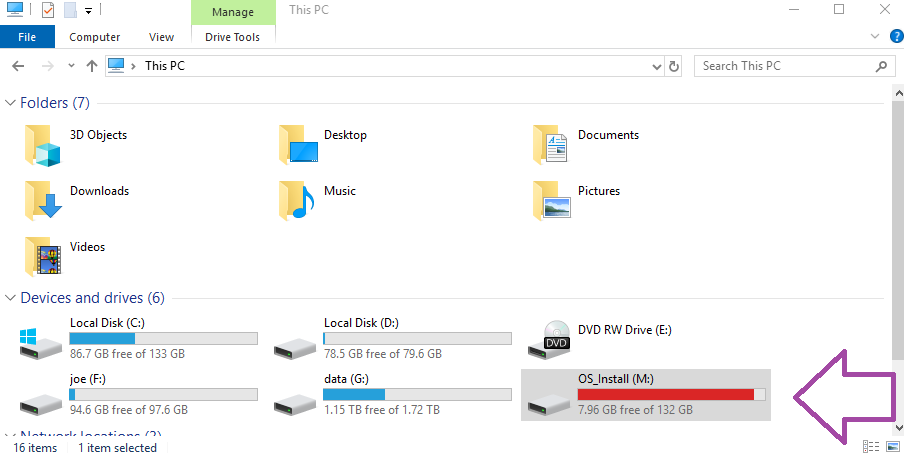
For demo, I just reassigned a different letter in my case.
Now you can access your backup drive image like a normal drive:
To access individual folders you have to provide admin access by click 'continue' in following dialog:
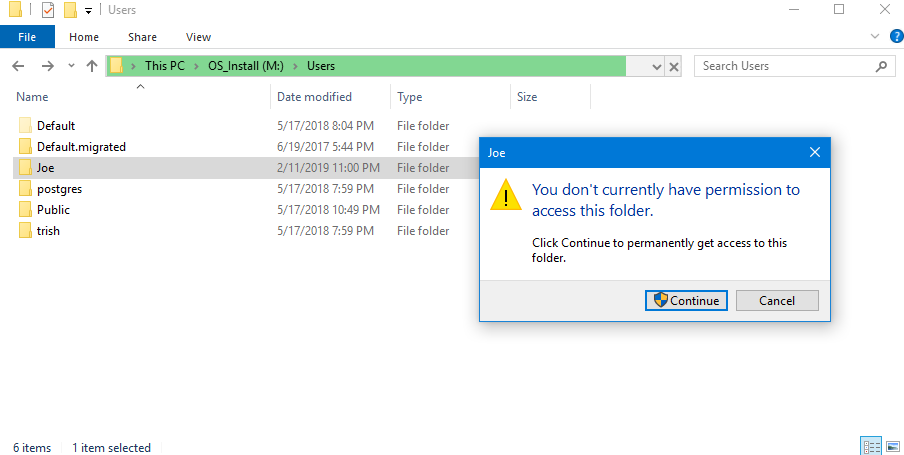
In case if some folder takes very long time to open (like that happened in my case M:\Users\Joe) you can open Command Prompt (run as admin)
and can quickly access individual files.
|